

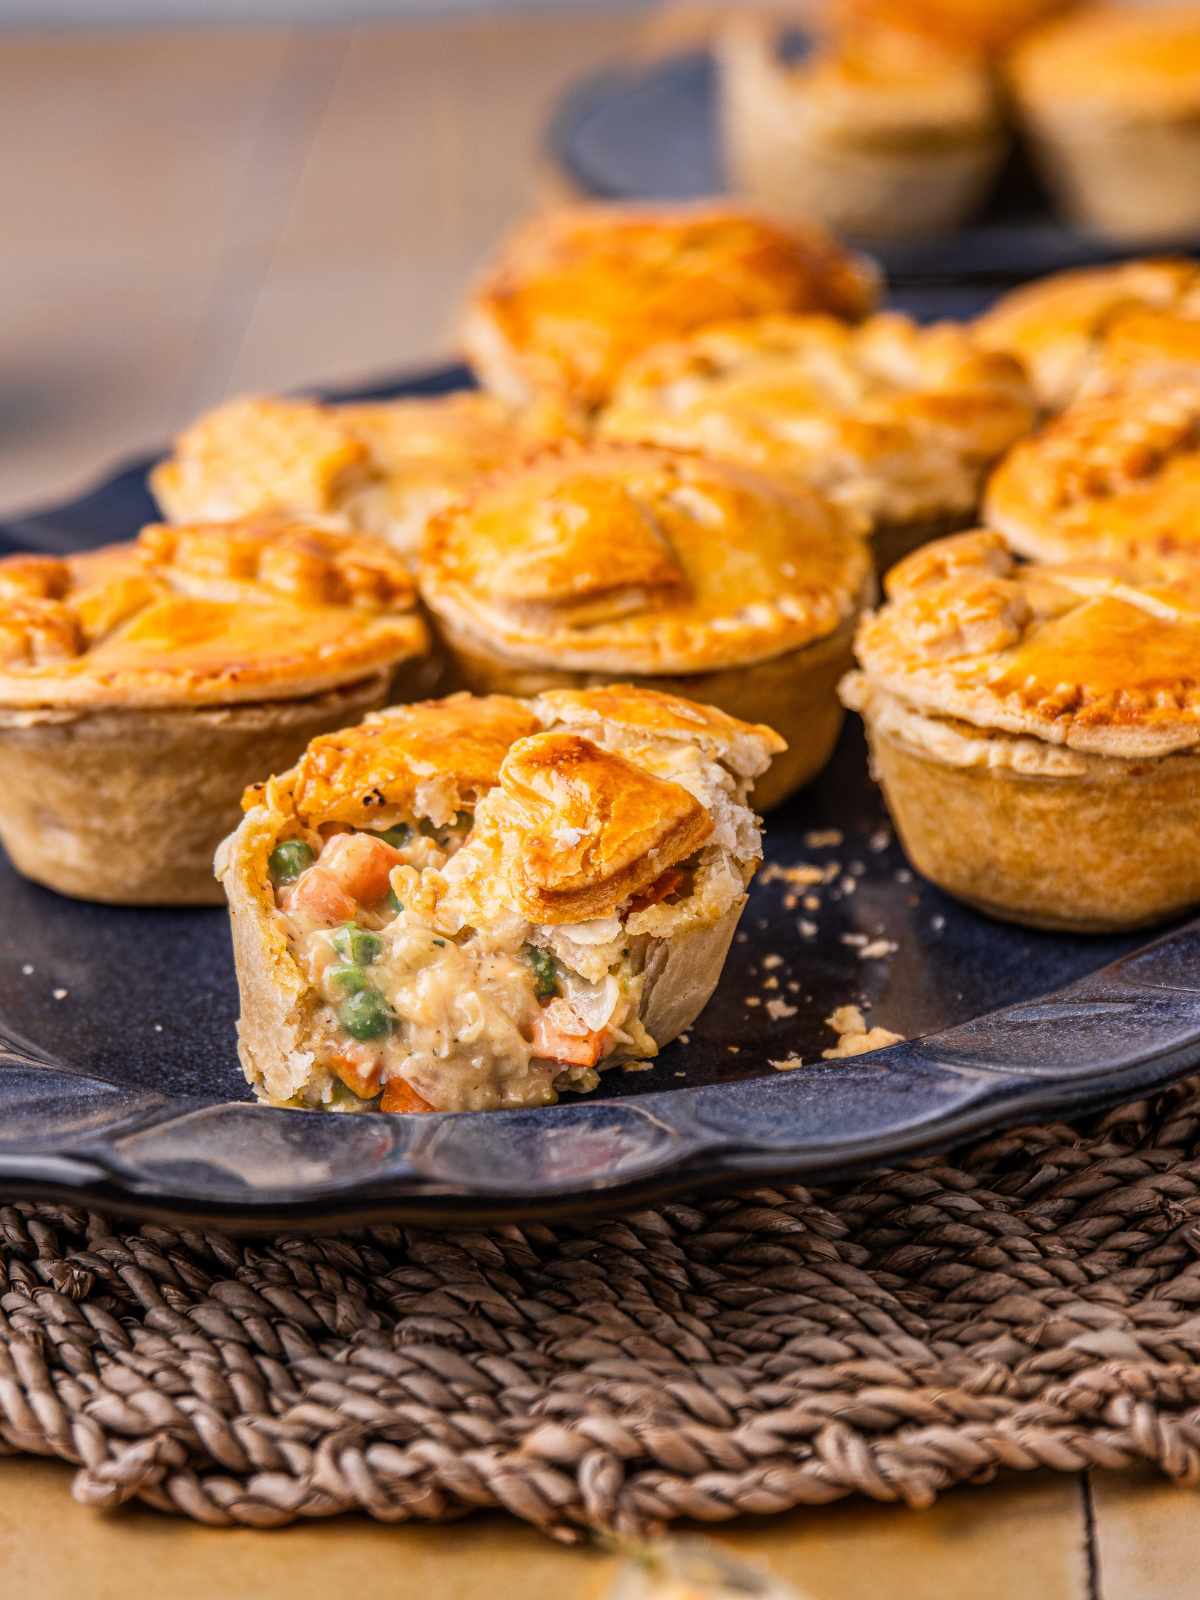
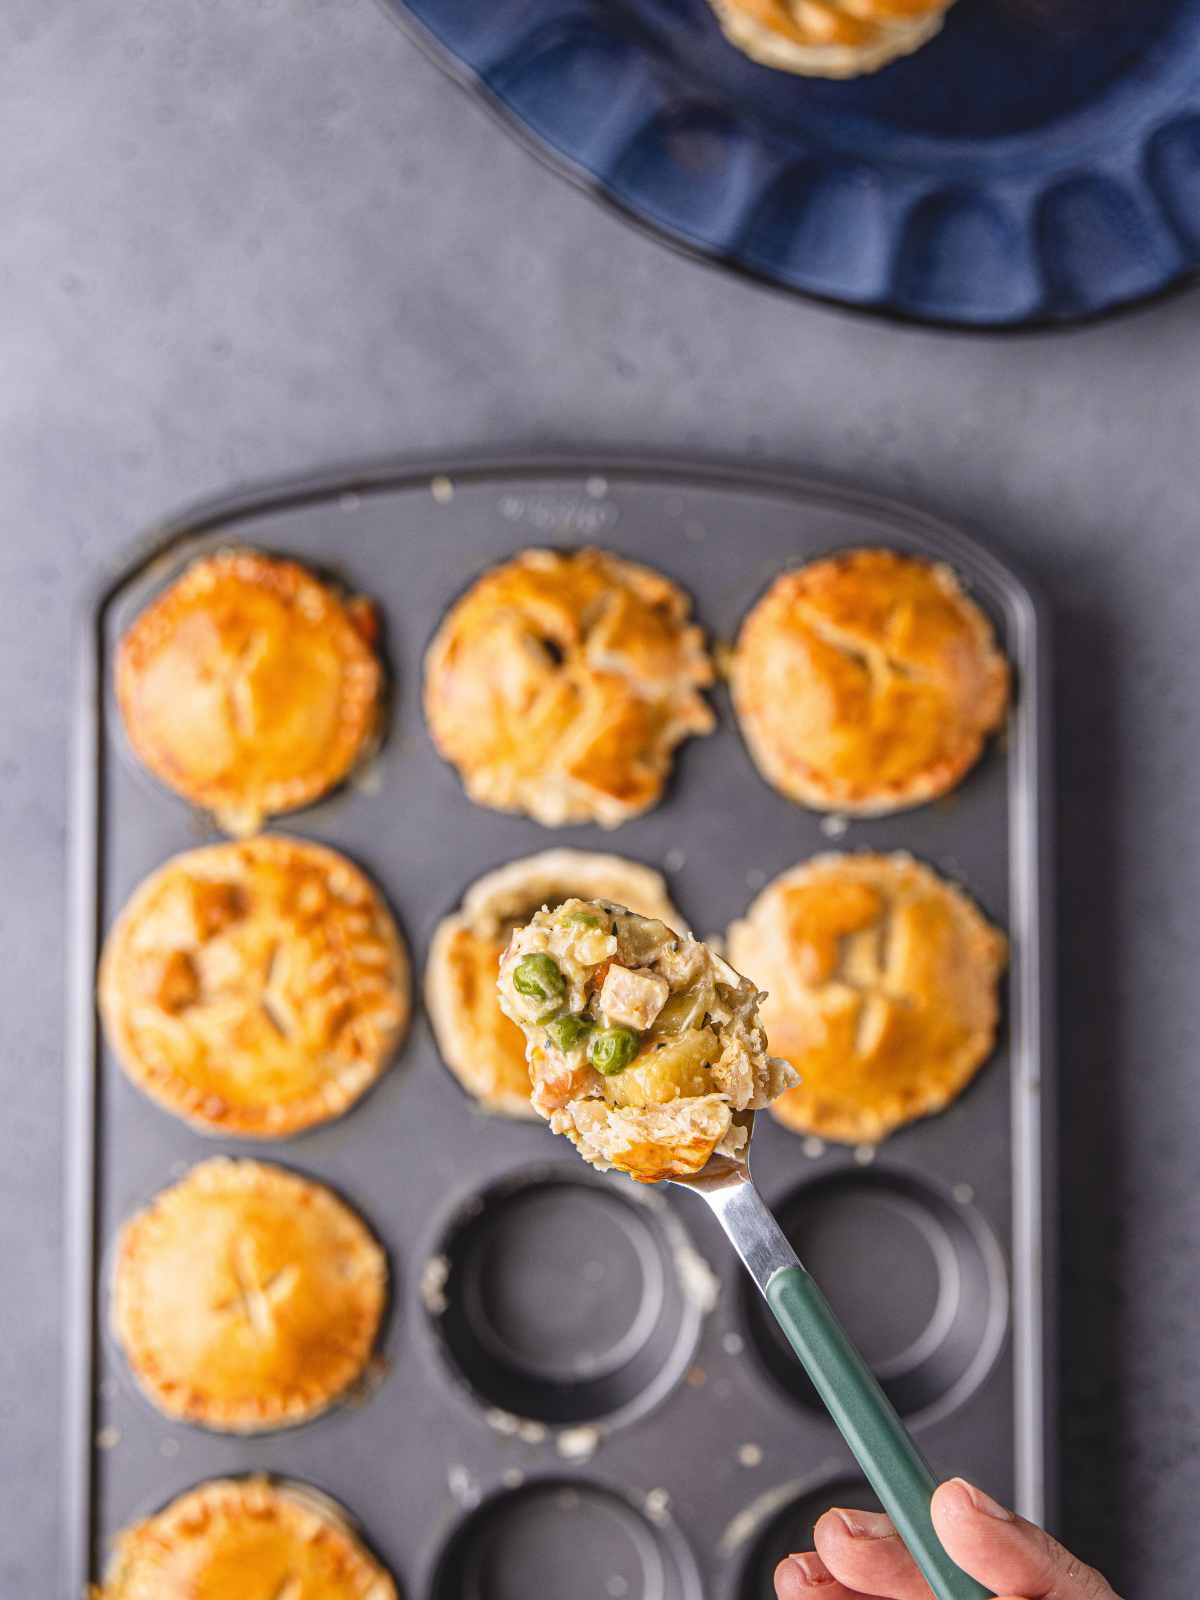
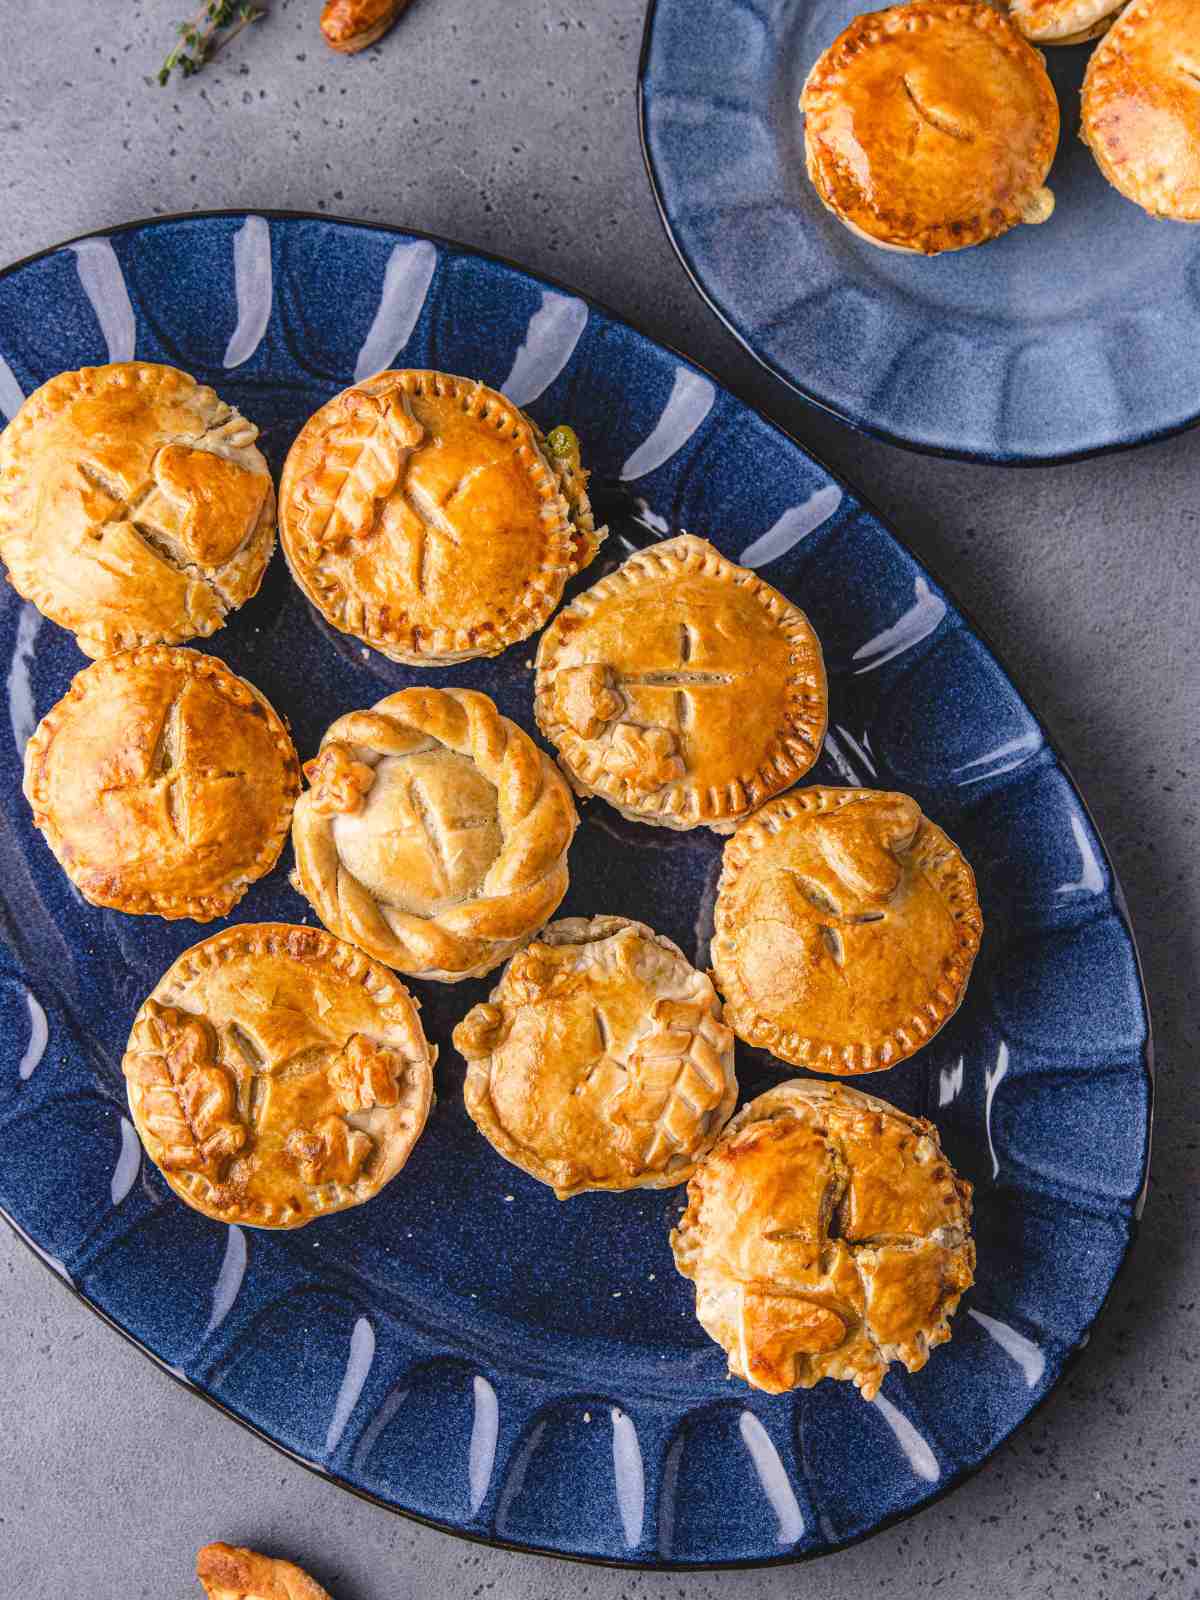
These mini simple Chicken Pot Pie with Cream of Chicken Soup takes minimal effort to make. It's creamy, flaky, and comfortingly nostalgic without the exhaustive prep.
These tasty mini pies are made in a muffin tin, yielding the perfect serving for your favorite holiday appetizer or side, like my butternut squash and carrot soup.

Although this recipe makes 12 mini muffin tin pot pies, it can be easily doubled. If you're looking for something even easier for the holidays, try my sauteed delicata squash or this eggless cornbread.
Jump to:
Why We Love This Chicken Pot Pie With Cream Of Chicken Soup Recipe
- Easy: Using a pre-made crust means less time waiting to chill and roll the dough, and more time enjoying a buttery, from-scratch-tasting pot pie that's soft-life approved. The condensed cream of chicken and celery soup already reduces cooking time. So you are basically cutting the crust, sautéing the filling, then baking.
- Perfect size: not only are they perfectly sized for on-the-go or lunch boxes, but these mini bites are also ideal for feeding a crowd. Think friendsgiving or family gatherings.
- They're great for weeknights, lunch boxes, or cozy dinners when you want big flavor with minimal cleanup.
- We used a pinch of chicken powder and fresh thyme to enhance the flavor, giving it that from-scratch taste.
Ingredients For Mini Chicken Pot Pies
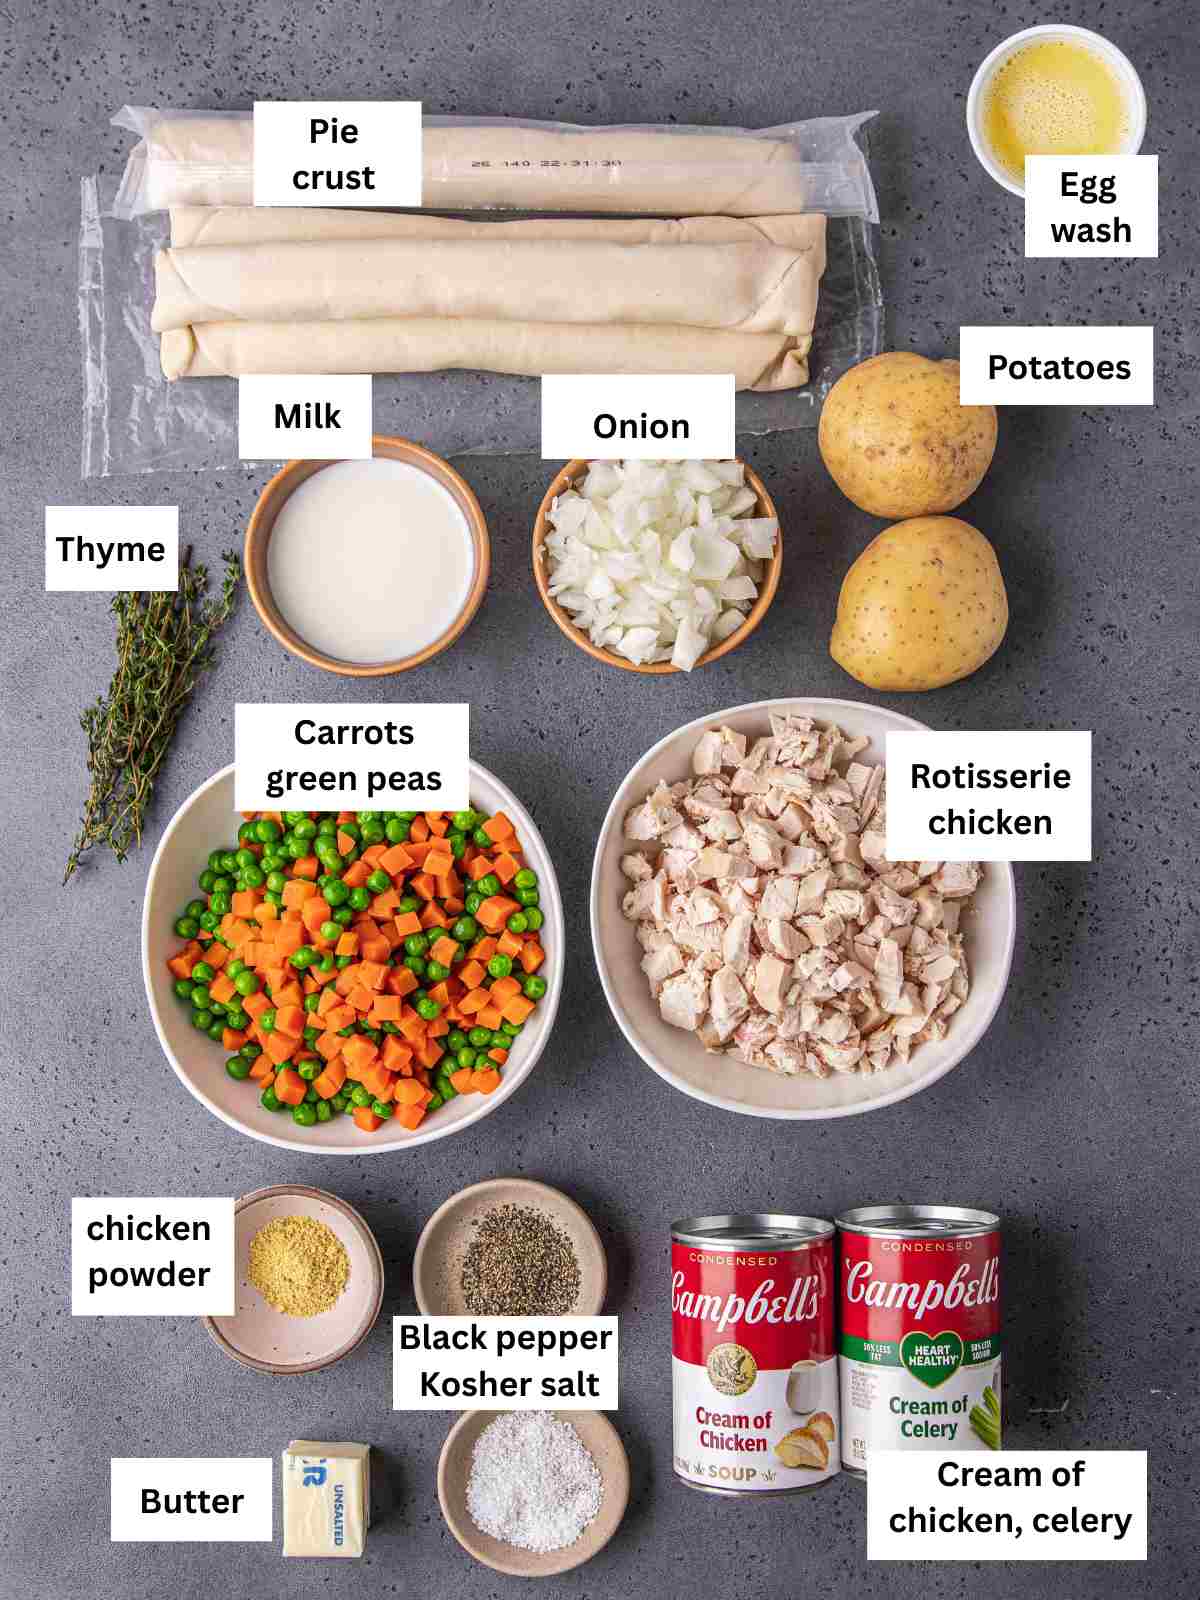
- Cooked Chicken: Rotisserie or leftovers, chopped small or shredded so every bite gets a little of everything.
- Pie Crust: I used four Pillsbury crusts. They're thinner now (you're not imagining it), so cut slightly larger rounds to overhang your muffin tin cups. That extra dough helps you seal the tops easily. Chill before baking to reduce shrinkage.
- Cream base: The condensed cream of chicken and celery provides the pie with a rich base it needs for a truly homemade taste.
- Vegetables: a combination of green peas and carrots adds the right amount of veggie goodness to this pie.
- Potatoes: I love to use russet or Irish potatoes for this dish. Par-cook before mixing into the filling. Sweet potatoes or butternut squash are just as good, and frankly, they add a nice sweetness to the pie.
- Chicken powder: This adds a significant amount of flavor, giving these mini pot pies an excellent chicken flavor. You can use Better Than Bouillon chicken flavor if you prefer.
- Herbs: I used fresh Thyme to brighten up the creamy filling and keep it from tasting flat.
Please refer to the recipe card for the exact measurements.
💭Variations and Substitutions
- Turkey: Try my mini turkey pot pie for a different variation.
- Ham & Cheddar: add cheese to the filling, swap the soups for cream of mushroom.
- Meatless: For a meatless version, use mushrooms and vegetables for an earthy flavor.
- Mini Hand Pies: no muffin tins? Fold and crimp for a grab-and-go snacking option, like my Nigerian Meat Pie recipe.
It's important to note that when making substitutions in recipes, the texture and flavor may be slightly different. However, these substitutes are the best options for changing the original recipe.
📝Step-by-Step Instructions
Detailed instructions are outlined in the recipe card below, but here are a few steps with visuals to guide you:
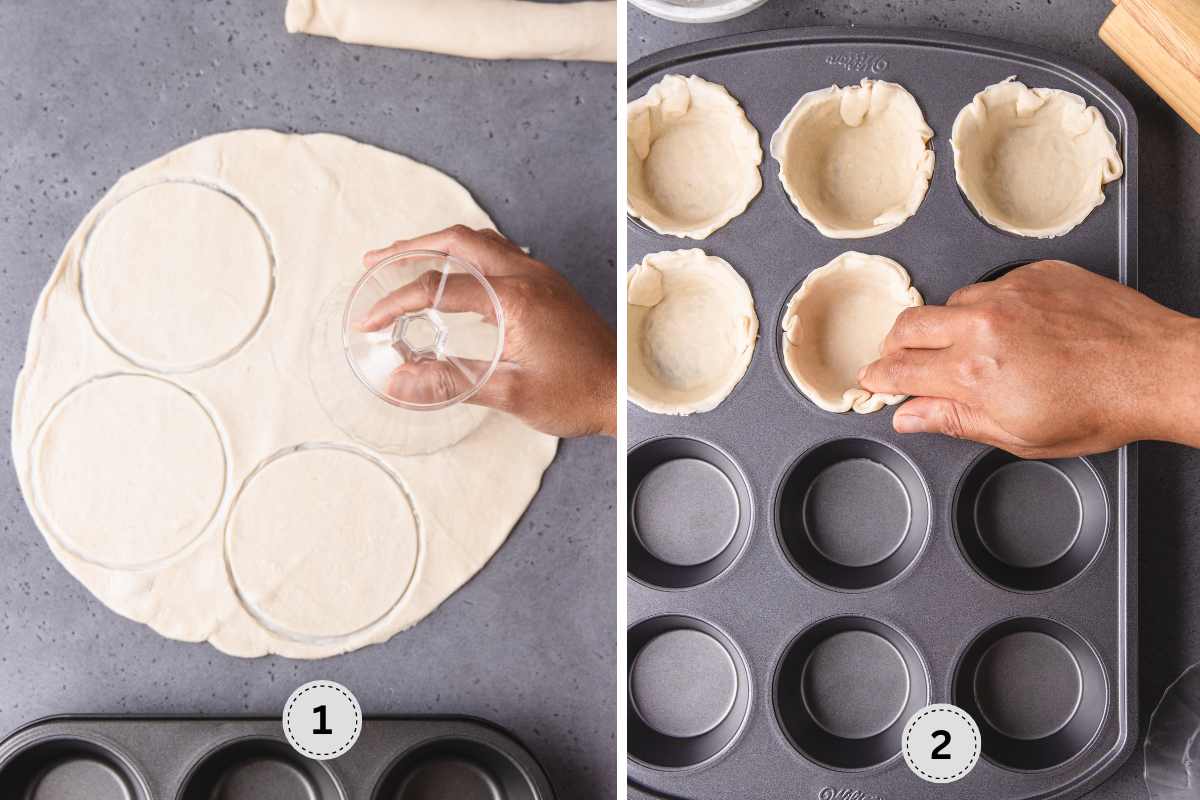
Step 1:
Use two 9" pie crusts for this round. Let them rest 15 minutes before unrolling. Cut 5-inch circles using a glass cup or cookie cutter.
Step 2:
Gently press into your muffin tins, careful not to stretch. Chill the lined tin while you make the filling.
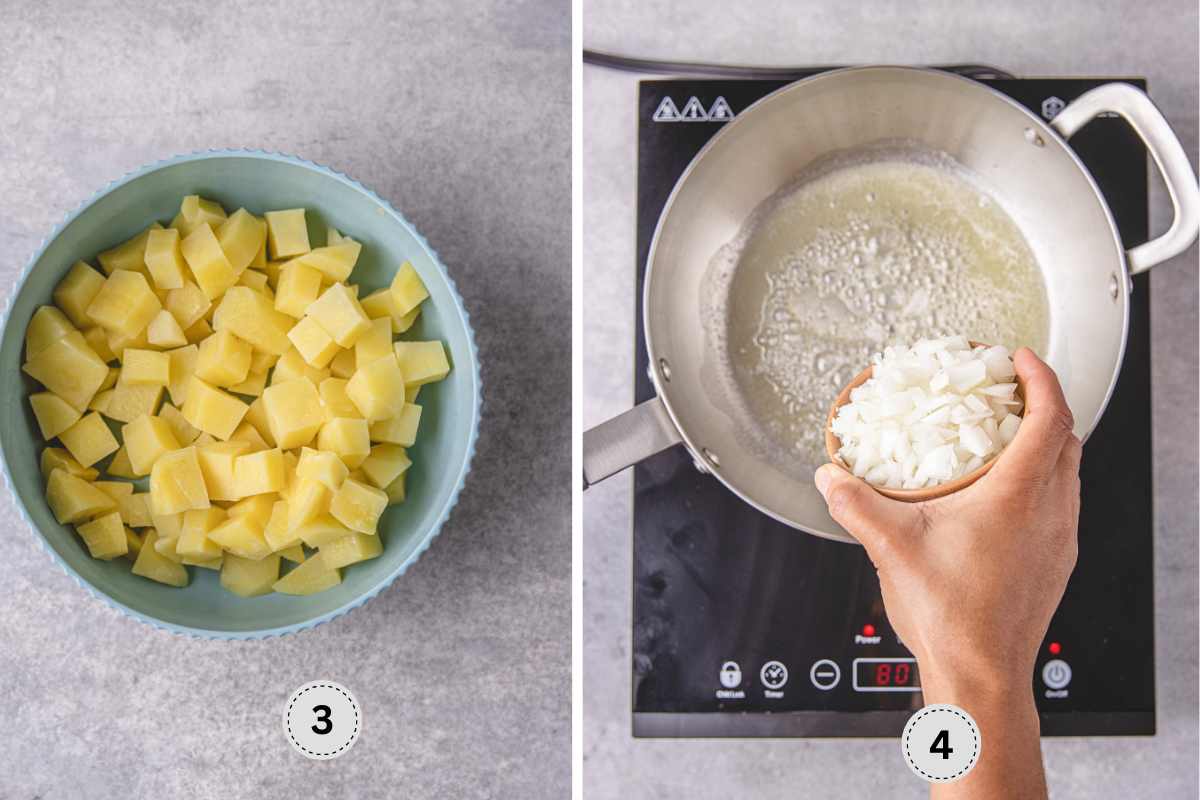
Step 3:
Place the cubed potatoes into a microwave-safe bowl, and heat for 3 minutes. This will help soften it while it cooks further in the oven.
Step 4:
In a skillet, sauté the onion in butter until it's translucent and soft, around 2 minutes.
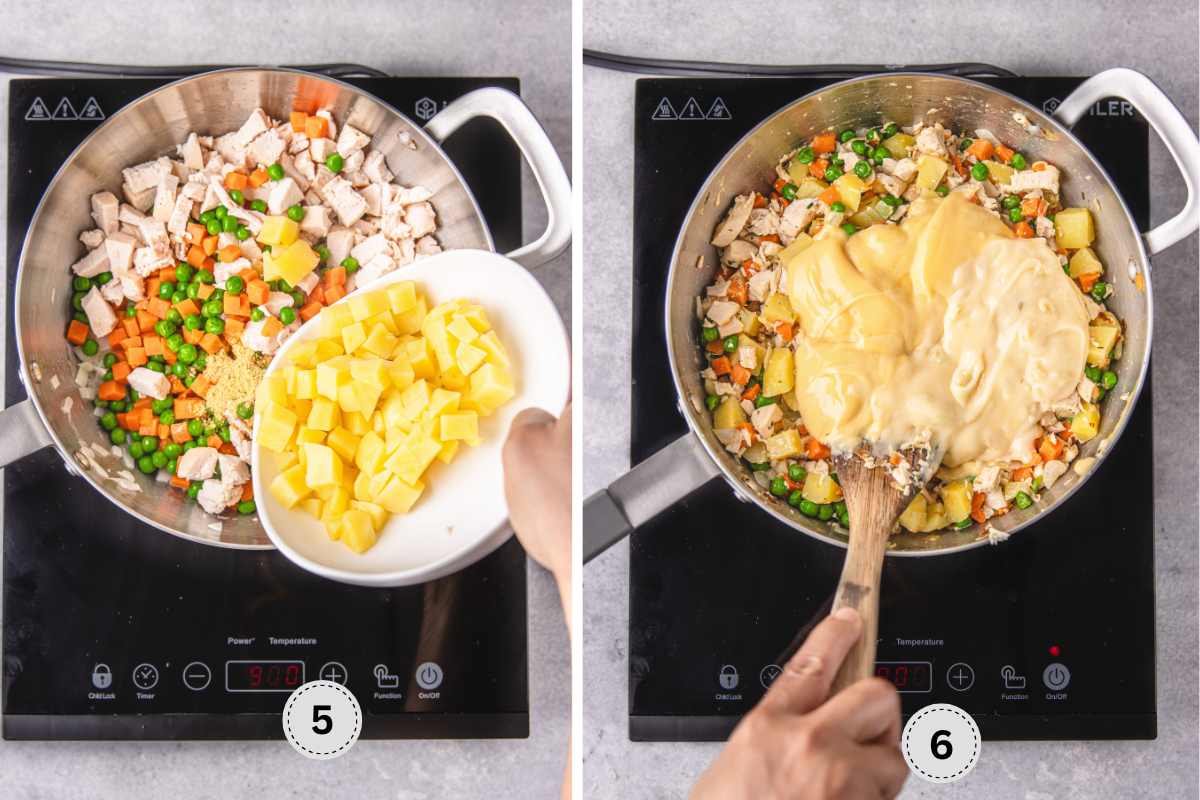
Step 5:
Add the veggies, par-cooked potatoes, chicken, chicken powder, and thyme. Stir to combine.
Step 6:
Add both soups, and give it a nice stir until the mixture is hot, glossy, and thick. Cook for a bit before adding milk to loosen it a bit. Add salt and pepper to taste. Set aside.
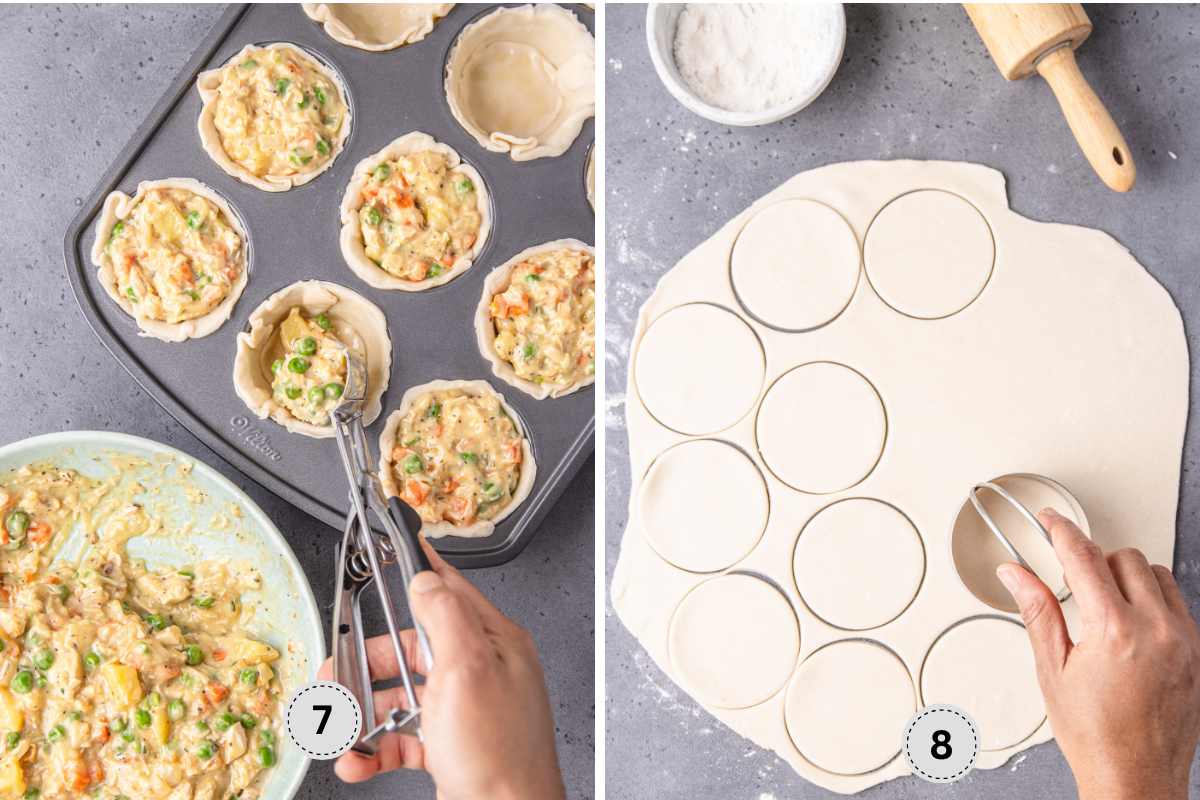
Step 7:
Spoon warm filling into the chilled crusts (¾ full).
Step 8:
Once softened, re-mold the pie crust, then roll and cut into 3-4" rounds.
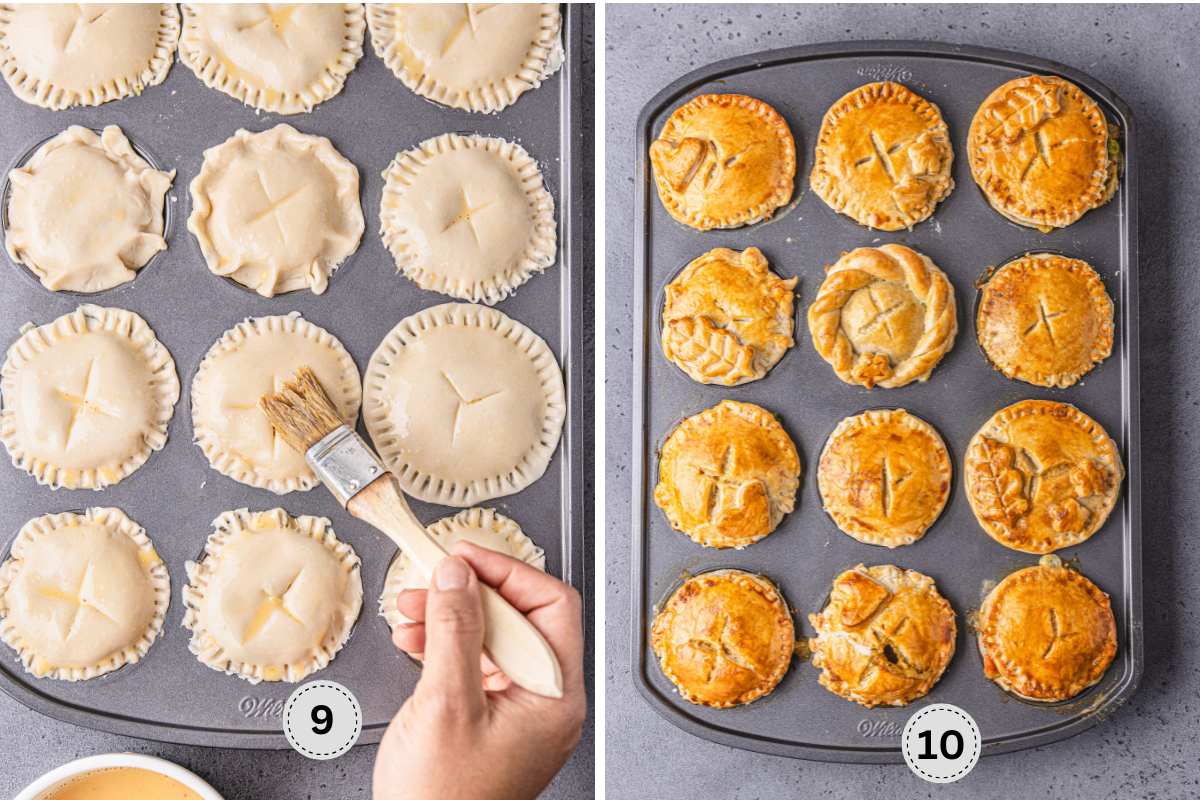
Step 9:
Add a top crust, crimp the edges, and cut small steam vents. Brush the top with egg wash and bake.
Step 10:
Bake at 400°F until golden. When you see tiny bubbles peeking through the vents, it's almost time to gobble. Rest 5 minutes, then serve warm with a salad.
Top Tip
If you're going to make this recipe, make sure to follow this top tip!
- Chilling the crust after it has been lined on the muffin tin prevents it from over-shrinking or browning before the filling is fully hot.
- To ensure the cubed potatoes soften fully in the pie, par-cook them for 3-4 minutes (either by boiling or microwaving) before adding them to the filling. It will continue to bake in the oven.
- Set your muffin tin on a preheated sheet pan to keep the bottoms of the muffins crisp.
- If the edges are browning too fast, tent with foil halfway through.
- Since the newer Pillsbury crust is thinner and tends to slip, it helps to chill the lined muffin tin before baking, press the dough in gently without stretching, and fill it right away so the heat and weight of the filling keep the crust securely in place.
- If you notice the sides pulling away during baking, gently press them back into the tin (carefully) right after removing it from the oven, before they cool completely.
- This newer Pillsbury crust requires a bit more TLC than the old version. Chill the crust after lining the tin, don't overfill, and bake at a high temperature of around 400°F to help it set quickly. Cover the edges with foil if they start browning too quickly.
- I find it easiest to remove the pies once they've cooled slightly, invert the tin over a cooling rack, then gently flip each pie upright.
Freezer and Make-Ahead Instructions
Freeze: Assemble fully, freeze flat, and bake straight from the freezer; add about 5 minutes to the baking time. For the baked crust, allow it to cool completely before freezing. Reheat at 350°F for 10-12 minutes (or 375°F in the air fryer for 6 minutes).
Refrigerate: refrigerate the baked pot pie for up to 4 days sealed airtight. Reheat in the oven (NOT microwave) for a crispier crust.
✅Recipe FAQS
Handle the dough gently and avoid stretching it, or it will pull back as it bakes. Line your muffin tin, chill it for about 10 minutes to help the dough relax, then fill it right away so the weight of the filling anchors it in place. Baking on a preheated sheet pan also helps set the bottom quickly and keeps the crust from sliding down.
Absolutely! You can bake them straight from the freezer without needing to thaw them. Add approximately 5 to 6 extra minutes to the baking time and keep a close eye on the edges to prevent overbaking. If they start to brown too quickly, loosely tent the tops with foil to keep that perfect golden color.
If your filling feels a little too loose, simmer it a bit longer before spooning it into the crusts. This helps reduce excess moisture and thickens the sauce so it stays creamy and rich instead of seeping into the crust.
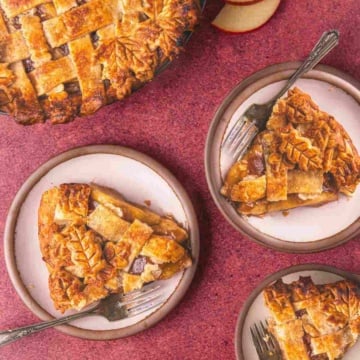
Love Pies? Here Are More Pie Related Recipes To Try:


Have you given this recipe or any other from my website a try? Please consider leaving a ⭐ star rating and sharing your experience in the 📝 comments section. Your feedback means the world to me, and I'm excited to hear from you!
PEACE & LOVE
Maureen
📖 Recipe

Chicken Pot Pie with Cream Of Chicken Soup (mini)
Equipment
- Muffin tin
- Sautee pan or skillet
- cookie cutter or glass cup (4" and 5" rounds)
- Rolling Pin (or empty wine bottle)
Ingredients
- 4 pre-made pie crust sheets store-bought will be 2 packs of 9" rounds
- 2 small russet potatoes peeled and cubed (Yukkon is fine)
- 3 tablespoons butter
- ½ medium sweet onion or shallots, about 171g
- 2 cups mixed vegetables I used peas and carrots, from one 12 oz bag, 340g
- 2 cups cooked chicken chopped or shredded (preferably rotisserie) 323g
- 1 tablespoon chopped fresh thyme from a 0.5 oz pack
- 1 (10.5 oz) can condensed cream of chicken soup
- 1 (10.5 oz) can condensed cream of celery soup
- 1 teaspoon chicken powder Better than Bouillon is fine
- 3 tablespoons whole milk plus more if needed
- Kosher salt and black pepper to taste
- Egg wash 1 large egg beaten with 1 tablespoon water
Instructions
- Lightly grease a 12-count non-stick muffin pan with cooking spray. Set aside.
- Make the Crust
- Remove the puff pastry from the box and let it thaw as directed on the package. It usually takes 15 minutes (if refrigerated) or 1 hour (if frozen).4 pre-made pie crust sheets
- Use a 5" round cookie cutter (or glass cup) to cut out 12 circles of puff pastry. You should get 5 rounds per sheet (4 in one go, then remold, roll to the same thickness as the original, and cut to obtain additional rounds, making it 5). Repeat this step for the remaining pie sheet for the bottom crust.
- Press each round into a hole of a 12-cup mini muffin tin. Use your fingers to work the dough and bring it up the sides of the muffin cup (try not to pull, as the pastry is fairly thin).(pro tip) Mold and flatten any scraps, then stick them to the bottom to give it a better structure, as the store-bought version is pretty thin.
- Place the muffin tin in the refrigerator while you make the filling.
- Preheat the oven to 375°F. Place a rimmed baking sheet into the oven (this will help crisp the bottom of the pie)
- Make the filling:
- Place the cubed potato in a microwave-safe bowl, cover it, and heat for 3 minutes. Set it aside.2 small russet potatoes
- Using a non-stick skillet or sauté pan, melt the butter over medium heat.3 tablespoons butter
- Add the onion, and cook for 2 minutes or until it's soft and translucent.½ medium sweet onion
- Stir in the peas and carrots, microwaved potatoes, chicken, and thyme. Cook for 2 minutes, covered.2 cups mixed vegetables, 2 cups cooked chicken, 1 tablespoon chopped fresh thyme
- Add the condensed soups with chicken powder, and give it a nice stir until everything is well combined.1 (10.5 oz) can condensed cream of chicken soup, 1 (10.5 oz) can condensed cream of celery soup, 1 teaspoon chicken powder
- Add the milk to loosen slightly, then season with salt and pepper to taste. Remove from heat.3 tablespoons whole milk, Kosher salt and black pepper to taste
- Make the top crust:
- Bring the crust to room temperature. Re-mold the crust, then roll it to 10" and cut into 4" rounds using a cookie cutter or glass cup. Use the scraps to create cute leaves or designs for the edges (see the photo in the post).
- Make the Pie:
- Spoon the warm filling evenly into each unbaked, chilled crust, filling it to the top but not overflowing.
- Brush the edges with egg wash, and add the top rounds. You can either pinch, flute, or crimp the edges of the bottom pie crust to seal. I like to crimp mine using a fork.Egg wash
- Brush the top with egg wash, then make three cuts on top of the pastry to allow steam to release.
- If you made the cut-out designs using the scraps, place them on the pie (try not to cover the vent cuts).
- Bake at 375°F for 35-40 minutes or until the filling is slightly bubbling and the crust is golden brown. (For a more golden crust, brush the top of the pie at 15-minute intervals.)
- Allow the pies to cool for at least 5 minutes before removing from the tins.
- To remove the pies from the tins, carefully run a blunt knife or spatula along the edges to release them from the tin.** I find it easiest to invert the tin over a cooling rack, then gently flip each pie upright.
- Serve immediately or refrigerate leftovers in an airtight container. Reheat in the oven for the best result.Please refer to the body of the posts for more useful cooking tips, process shots, and serving options.
Notes
- My muffin tin is nonstick, but you can lightly grease yours or place parchment paper strips in an "X" shape at the bottom of each tin to make removing the pies easier and prevent sticking.
- Chilling the lined tin before baking.
- Avoid any stretching when pressing dough into cups.
- Adding the filling promptly allows the crust to anchor with heat and weight.
- Never overfill.
- Keep the oven hot enough to set the crust quickly (after multiple tests, I found that 375°F-400°F is the sweet spot).
- Tent with foil if edges brown too fast.


Leah says
Can I make this in a deep dish pan? It looks so good, and easy.
Maureen Celestine says
Hi Leah, absolutely! Depending on the pan size, you might need to double the filling.